Solving Common MacBook Air Problems: Quick Fixes & Tips
Encountering hiccups with your MacBook Air? Here’s how to quickly troubleshoot and solve common issues.

Troubleshooting Startup Issues
When our MacBook Air fails to start up, it can feel like a major crisis. But fear not! We’ve gathered some reliable methods to get our Mac up and running.
Resetting the SMC
System Management Controller (SMC) is crucial for a variety of hardware functions, including battery management and thermal control. If our MacBook Air is misbehaving on startup, an SMC reset might be in order.
To do this, first shut down the device. Then, press Shift-Control-Option on the left side of the built-in keyboard and the power button at the same time.
After 10 seconds, release all keys, and then press the power button to turn on the computer. This simple step can resolve issues from unresponsive hardware to cooling fan problems.
Using Safe Mode
Safe mode is like a magic wand for fixing startup woes on the MacBook Air. It performs a check of our startup disk and loads only the essential components necessary to run the Mac, which can help bypass software-related issues.
To enter safe mode, we press the power button and then immediately press and hold the Shift key until we see the login window. Once in safe mode, we often find that our startup issues disappear or become easier to diagnose.
Recovery Mode and Disk Utility
Occasionally, we might encounter disk errors, which impede our MacBook Air from starting up properly.
In such cases, Recovery Mode is our best ally. We access Recovery Mode by holding down Command-R immediately after we switch on the Mac.
One of the tools available here is Disk Utility, which we can use to repair our startup disk. It’s a straightforward process—select our disk, click on “First Aid,” and let Disk Utility do its thing.
During one of my previous encounters with a stubborn MacBook that refused to cooperate, running Disk Utility in Recovery Mode was like a charm—restoring order with a few clicks.
With these techniques, we’re well-equipped to handle various startup issues that may arise with our MacBook Air. Remember, taking a methodical approach to troubleshooting can save us time and frustration.
Fixing Battery and Power Problems

When it comes to our MacBook Air, ensuring the longevity and health of the battery is critical, as is maintaining the ability to charge efficiently. We’ll explore a few simple steps to keep our MacBook Air running smoothly.
Checking Battery Health
Our MacBook Air’s battery is like its heartbeat, and we need to regularly check its health. To do this, hold down the Option key and click the battery icon on the menu bar to view the battery’s condition.
If it says “Service Battery,” it may be time to consider a replacement. For a more detailed view, go to “System Preferences” > “Energy Saver” and select “Battery Health” to see more information about the battery’s overall capacity relative to when it was new.
Managing Energy Settings
We can extend our MacBook’s battery life by managing energy settings effectively. Navigate to “System Preferences” > “Energy Saver” and explore the options available. Here’s a quick table that clarifies what each setting will do:
| Setting | Effect |
|---|---|
| “Turn display off after” slider | Saves power by reducing the time the screen stays on when inactive |
| “Put hard disks to sleep when possible” | Minimizes power consumption when we’re not actively using the hard drive |
| “Slightly dim the display while on battery power” | Lowers display brightness to save energy |
Resolving Charging Issues
If we’re encountering issues with our MacBook not charging, there are a few things we can try. First, ensure that the power adapter and cable are not damaged and are properly connected.
Sometimes, just unplugging and replugging can resolve minor connection issues.
If our Mac still won’t charge, a System Management Controller (SMC) reset might be necessary.
Remember, if our MacBook Air is experiencing persistent charging problems, there could be an issue with the power port or internal hardware, and it may require professional attention.
Addressing Display and Graphics

When it comes to our MacBook Air, ensuring that the display settings are properly adjusted and handling any screen flickering effectively are crucial for an optimal viewing experience.
Adjusting Display Settings
To tweak display settings, we usually navigate to System Preferences > Displays. Here, we can ensure the resolution is set correctly for our needs. It’s not uncommon for us to run into issues where the screen isn’t quite as bright or sharp as we’d like.
Adjusting the brightness and checking the color profile can sometimes clear up these issues. A vital thing to remember is:
- Resolution: Aim for the default for your particular MacBook Air model—it’s typically the recommended setting.
- Brightness: Slide to adjust to a comfortable level that suits your current environment.
- Color Profile: If the colors seem off, choose a different profile to see if it improves display accuracy.
A personal note: In my experience, I’ve found that sometimes simply adjusting the brightness can significantly reduce the eye strain I felt after long sessions of writing.
Dealing with Screen Flickering
Encountering screen flickering on our MacBook Air can be alarming but often it’s fixable. We’ve seen this can be due to software issues or, less commonly, hardware problems. To sort this out, we start with the simpler fixes, like checking for software updates or restarting our MacBook Air in Safe Mode to diagnose if third-party applications are the culprits.
If the issue persists, we find it may be helpful to reset the PRAM/NVRAM or the SMC (System Management Controller), especially if the flickering occurs when we use certain applications or attachments. However, if we feel it’s beyond our expertise, we always suggest seeking help at the Apple Store or from a certified technician. A handy checklist for screen flickering is:
- Ensure software is up to date
- Boot in Safe Mode to identify offending applications
- Reset PRAM/NVRAM and SMC if the above doesn’t fix the flickering
- Consult with professionals for persistent issues
A quick anecdote: The first time I encountered flickering on my MacBook Air, it turned out that a simple system update was all it needed. It was a relief that the solution was such a simple fix!
Improving Performance
Boosting your MacBook Air’s performance can be essential to maintaining a smooth and efficient workflow. We’ll walk through key strategies such as clearing out unnecessary files, considering hardware upgrades, and managing storage smartly to get your MacBook running at its best.
Clearing Cache and Junk Files
Over time, our MacBooks accumulate cache and other junk files that can clog the system, leading to sluggish performance.
Whenever I clear these files, I immediately notice how much quicker my applications run. To start, open Finder, select “Go to Folder” from the Go menu, and type in ~/Library/Caches. Here’s how we can tidy up:
- Safari: Go to Safari > Preferences > Advanced and select “Show Develop menu in menu bar,” then select Develop > Empty Caches.
- System and User Caches: In the
~/Library/Cachesfolder, manually delete the contents of the folders, but not the folders themselves.
Upgrading Hardware Components
Sometimes, hardware limits the MacBook’s capabilities. For example, upgrading from a traditional hard drive to a Solid State Drive (SSD) can tremendously improve boot times and application launches. Here’s a quick comparison:
| Component | Before Upgrade | After Upgrade |
|---|---|---|
| Storage Type | Traditional Hard Drive | Solid State Drive (SSD) |
| Boot Time | ~2 minutes | ~30 seconds |
| Application Launch | Slow | Instantaneous |
Remember to check your MacBook Air’s model for compatibility before attempting any hardware changes.
Optimizing Storage
A cluttered hard drive is a slow one. To ensure optimal performance, regularly review and clean up your disk space, which macOS makes quite simple:
- Open the Apple menu and select “About This Mac.”
- Click the “Storage” tab followed by “Manage.”
macOS offers recommendations to optimize storage, such as storing files in iCloud, enabling the “Empty Trash Automatically” feature, and reviewing and deleting large files.
By focusing on these practical steps, we can breathe new life into our MacBook Airs, ensuring they continue to serve us effectively for all our tasks.
Connectivity Solutions
When our MacBook Air struggles with connecting to the internet or other devices, it can be a real hindrance to our workflow. Luckily, there are tried and tested solutions to handle these pesky connectivity issues. We’ll walk through some Wi-Fi and Bluetooth troubleshooting steps that can help us regain our connection quickly and efficiently.
Wi-Fi Troubleshooting
If our MacBook Air is having trouble connecting to Wi-Fi, it’s essential to ensure that the problem isn’t with the router or internet service. Sometimes, a simple restart of the router can solve the issue.
Fixes to Try First:
- Restart the router and modem
- Turn Wi-Fi off and on from the MacBook Air’s menu bar
Advanced Wi-Fi Troubleshooting:
- Check System Preferences: Go to System Preferences > Network and check if Wi-Fi is selected and on.
- Renew DHCP Lease: Sometimes, clicking ‘Renew DHCP Lease’ can prompt our MacBook to establish a fresh connection.
- Safe Mode: Booting in Safe mode may resolve any Wi-Fi issues caused by software.
Sometimes I find that switching the DNS servers to Google’s public DNS or OpenDNS can magically resolve these pesky Wi-Fi interruptions.
Bluetooth Devices Connection
Staying connected to our favorite Bluetooth devices like keyboards, mice, or headphones should be hassle-free. But when they’re not connecting, it’s a frustration we’d all like to avoid.
Tips to Regain Bluetooth Connectivity:
- Turn Bluetooth Off and On: This can be done via the menu bar on the MacBook Air.
- Delete Devices and Pair Again: Sometimes, our MacBook Air needs a fresh start with our devices.
Remembering Devices:
| Step | Action |
|---|---|
| 1 | Go to System Preferences > Bluetooth |
| 2 | Hover over the device you’re having trouble with |
| 3 | Click the ‘X’ to forget the device |
| 4 | Pair the device again |
When our mouse was acting up, I discovered removing it from the list of devices and re-pairing it was like giving it new life.
While we hope our MacBook Airs never run into connectivity issues, knowing these quick fixes can save us time and keep our frustrations at bay. The next time our Mac is stubborn about connecting, we know exactly where to start.
Resolving Sound Issues
In our journey as technology aficionados, one of the common hurdles we encounter with our MacBook Air revolves around sound. Whether it’s silent movies or muted video calls, let’s dive into the nitty-gritty of getting our audio back on track.
Fixing Audio Playback
First and foremost, our go-to method is checking the volume controls. It’s a simple step, but you’d be surprised at how often the solution lies in unmuting the sound or cranking up the volume slider. Here’s a quick checklist:
- Volume Level: Ensure it’s not set to the lowest point.
- Mute Setting: Double-check to make sure your MacBook Air isn’t muted.
- Sound Output: Go to System Preferences > Sound > Output and confirm your speakers are selected.
If these steps don’t work, it’s time to reboot the Core Audio process:
- Open Terminal.
- Type
sudo killall coreaudiodand press Return. - Enter your password if prompted.
In my experience, sometimes external devices can hijack the audio output. I remember plugging in an HDMI cable and forgetting to switch the sound back to the internal speakers afterward!
Troubleshooting Microphone Problems
When it comes to microphones, ensuring proper settings and software health is key. Here’s our quick-hit guide:
- Input Settings: Check System Preferences > Sound > Input to confirm the internal microphone is selected.
- Volume Levels: Adjust the input volume slider to ensure your mic isn’t too quiet.
| Common Microphone Fixes | Description |
|---|---|
| Reset PRAM/NVRAM | Resets system settings including sound preferences |
| Safe Boot | Starts with only essential system extensions |
| macOS Update | Addresses known audio bugs and glitches |
One peculiar issue we ran into was when our MacBook Air mic picked up minimal audio until a system update magically fixed it. It was as if our Air had finally found its voice again!
Remember, frequent software updates can prevent or resolve most sound issues, so keeping your macOS up-to-date is always a good idea.
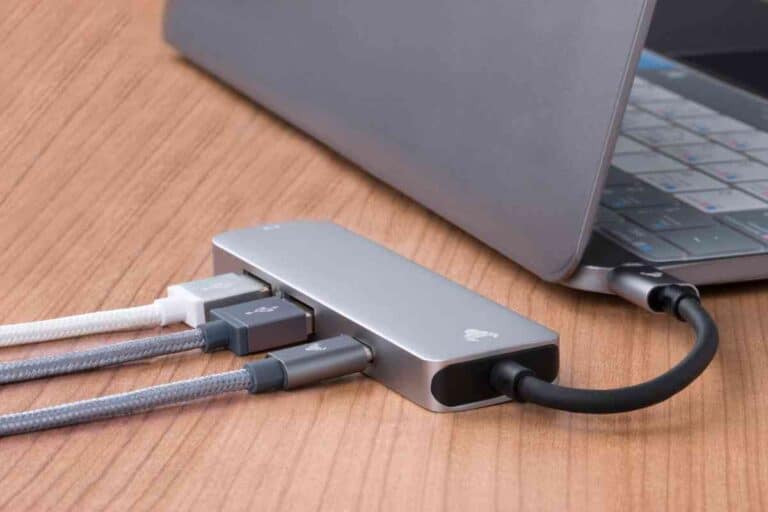
Peripheral and Accessory Integration
When we talk about integrating peripherals and accessories with the MacBook Air, we’re discussing the seamless operation and function of external devices like USB drives or monitors with your laptop. It’s crucial that these devices work as intended because they’re often essential to our productivity and the way we interact with our MacBook Air.
Managing USB Connections
We’ve all been there: you plug in a USB device, and nothing happens. First, check if the device is compatible with your MacBook Air. If it is, the issue could lie with the USB port or the device itself. We recommend trying different ports if available. Sometimes, a simple system restart can get things back on track. Here’s a quick checklist we’ve found useful:
- Ensure the USB device is properly inserted.
- Try different USB ports.
- Check for updates in your system preferences.
- Restart your MacBook Air.
- If none of these steps work, the USB device or cable may be faulty.
Working with External Displays
Connecting to an external display can expand our workspace, but it’s not without its hiccups. For a smooth integration, we verify our cables and adapters are Mac-compatible.
Also, we always check if our MacBook Air’s settings match the requirements of the display. If your screen doesn’t look quite right, adjusting the display settings usually does the trick. Here’s the procedure we follow:
- Connect the display using the right cable and adapter.
- Go to System Preferences > Displays.
- Click the ‘Arrangement’ tab.
- Set the external monitor as an extended desktop or mirrored display.
- Tweak resolution or scaling to fit your preference.
Personally, I’ve found that using high-quality cables and keeping the MacBook Air software up to date minimizes issues. Remember, not all monitors are plug-and-play, and sometimes you need to fiddle with settings to get things just right.
Software and Update Fixes
In tackling the common issues you may encounter with your MacBook Air, ensuring your software is up to date and correctly installed is often the first step. These fixes can resolve a range of errors from system crashes to peripheral malfunctions.
Updating macOS
macOS updates not only provide new features but also contain critical bug fixes that enhance your MacBook Air’s performance and security. To update macOS:
- Click on the Apple menu in the top-left corner of your screen.
- Select System Preferences.
- Click Software Update.
- If an update is available, click the Upgrade Now button to install.
Remember, before updating, always back up your important files, just in case.
Reinstalling Apps and Drivers
Sometimes, updates alone don’t fix the issue. If an app isn’t working correctly, it’s worth trying to reinstall it.
- Drag the malfunctioning app to the Trash from your Applications folder.
- Re-download it from the App Store or the official website.
- Follow the installation prompts to reinstall the app.
For drivers, particularly those related to your Mac’s hardware:
- Open Finder and navigate to /Library/Extensions.
- Locate and remove any files related to the problematic hardware.
- Download the latest drivers from the manufacturer’s website or by running Apple Software Update.
- Restart your MacBook Air after reinstalling drivers.
Anecdote from experience: There was a time when our Bluetooth speaker kept disconnecting. The solution? We reinstalled the audio drivers, and just like that, the problem was resolved—no more choppy music for us.
Keyboard and Trackpad Response
In the life of a MacBook Air, facing keyboard and trackpad issues is a rite of passage. While these problems can be frustrating, there are tried-and-true solutions that can bring your device back to life.
Cleaning and Maintenance
Dirt and debris can play a significant role in the malfunctioning of keyboard and trackpad components. We’ve found that a soft cloth lightly dampened with water can effectively clean the surface. Just make sure your MacBook Air is powered off before you begin.
- Use a lint-free cloth to gently wipe the trackpad surface.
- Compressed air can blow away crumbs or dirt stuck beneath keys.
- Avoid using any cleaning solutions directly on the trackpad or keyboard.
Recalibrating the Trackpad
Sometimes, our trackpads just seem to lose their sensitivity or start acting erratically. I remember when my trackpad began selecting everything in sight; a simple recalibration fixed things right up.
Here’s a quick table on how to recalibrate your trackpad:
| Step | Action |
|---|---|
| 1 | Turn off the MacBook Air. |
| 2 | Hold down the power button for at least 5 seconds. |
| 3 | Wait a few seconds and turn it back on. |
In recalibrating the trackpad, you’re essentially resetting the hardware’s sense of touch and interaction, which can resolve many common issues.
Data Backup and Recovery
Before we dive into specifics, it’s essential to understand that safeguarding our data through regular backups can save us from the frustration of unexpected data loss. When things go south, having a robust data recovery strategy can be a lifesaver.
Time Machine Setup
Time Machine, the built-in backup feature of our Mac, is a straightforward and effective way of ensuring we never lose our important documents, photos, or other files. To set it up, connect an external hard drive to the MacBook Air and select it as the backup disk when prompted.
Time Machine will then automatically make hourly backups for the past 24 hours, daily backups for the past month, and weekly backups for previous months. Our pro tip: make sure the backup disk has at least two to three times the storage capacity of the internal drive of the MacBook Air.
Data Recovery Options
Should we find ourselves in a pinch, there are multiple data recovery options to consider. These options range from utilizing the Recovery Mode to restore files from Time Machine to employing third-party software for more severe scenarios.
For a MacBook Air that won’t boot, holding down the Command and R keys during startup can give us access to the macOS Recovery, where we can restore from a Time Machine backup.
If Time Machine isn’t an option, there’s hope with professional data recovery services that specialize in retrieving data from unbootable or damaged MacBook Airs.
I remember once, I thought all was lost when my MacBook Air took a tumble off the desk, but thanks to such a service, we had our files back in no time.
It’s important to act quickly and not use the MacBook Air to prevent overwriting lost files, thereby maximizing our chances of a successful recovery. Here’s a quick reference table for when you should consider each recovery option:
| Recovery Method | Situation |
|---|---|
| Time Machine Restoration | Accidental deletion or drive malfunction |
| macOS Recovery | System errors, Non-responsive MacBook Air |
| Third-party Software | Time Machine backup failure, Formatted drive |
| Professional Recovery | Physical damage, Severe system corruption, Unbootable Mac |
Always remember, regular backups and knowing our recovery options are the keys to our digital peace of mind.
Handling Security Concerns
Ensuring the security of our MacBook Air involves staying vigilant and keeping our systems up to date. We’ll tackle the updates to our security settings and the detection of malware to keep our data protected and our MacBook Air running smoothly.
Updating Security Settings
To heighten our MacBook Air’s defenses, the first step is to check for the latest macOS updates. These often include security patches that can prevent potential breaches:
- Click on the Apple menu and select “System Preferences.”
- Choose “Software Update” to see if there are updates available.
- If updates are found, click “Update Now” to install.
Additionally, reviewing our privacy settings can further secure our personal information. Go to “System Preferences,” click on “Security & Privacy,” and customize settings like firewall options and app permissions.
For more detailed security options, especially if your MacBook Air doesn’t start due to suspected security issues, you can learn how to set security options to safeguard your startup disk.
Identifying Malware and Viruses
Malware and viruses can stealthily compromise our MacBook Air. To identify and remove these unwanted guests:
- Use Spotlight to search for and open “Activity Monitor,” then scrutinize CPU and memory usage for any unfamiliar processes that may signal an infection.
- Install a reputable antivirus or anti-malware application designed for macOS to scan for and eliminate these threats.
Your vigilance in updating security settings and identifying malware is our cornerstone in maintaining the integrity of our MacBook Air.
Understanding Error Messages
When our MacBook Air displays an error message, it’s often trying to tell us something important about its current state. We just need to interpret these signals correctly to address any issues at hand. Below, we’ll break down some common error codes and ways to decipher system logs, so we can get back to work as quickly as possible.
Common Error Codes
Error codes are like shorthand communication from our MacBook’s system, alerting us to various issues. Here are some prevalent ones:
- Kernel Panic: This is a classic “something has gone wrong” message usually displaying as “Your computer restarted because of a problem.”
- Error 36: This indicates an “I/O error” (Input/Output error), meaning there might be an issue with the Mac’s ability to read or write to a disk.
To help us further, Apple provides a support page with a comprehensive list of system errors that explains the cause and solution for each code. These can be a lifeline in figuring out what’s wrong.
Deciphering System Logs
The Console app is where our MacBook keeps a detailed diary of its operation in system logs. Here’s a quick guide to using the Console:
- Open the Console app from the Utilities folder.
- On the left pane, select “system.log” to view system messages.
- Use the search bar to filter specific terms related to the error you’re experiencing.
For example,last time I encountered a persistent issue, I searched the logs for terms relevant to the app that was crashing, and found out it was a permission issue.
By familiarizing ourselves with the Console and understanding the system’s communication, we become adept at swift and effective troubleshooting.
More Macbook Air Articles: (Read These Next)
- Best MacBook Air Models
- MacBook Air Buying Guide
- Setting Up Your New MacBook Air
- MacBook Air Storage Options
- MacBook Air for Students
- MacBook Air vs MacBook Pro
- Enhancing MacBook Air Performance
- Top MacBook Air Accessories
- Solving Common MacBook Air Problems
- MacBook Air for Writers
- Latest macOS Features for MacBook Air
- MacBook Air for Remote Work
- Buying a Refurbished MacBook Air
- MacBook Air Keyboard Shortcuts
- MacBook Air for Travel
- Securing Your MacBook Air
- MacBook Air and the Apple Ecosystem
- MacBook Air Screen Features
- Personalizing Your MacBook Air
- MacBook Air for Content Creation
- Transitioning to MacBook Air from PC
- MacBook Air for College
- Light Gaming on MacBook Air
- Extending MacBook Air Battery Life
- MacBook Air Connectivity and Ports
- Using MacBook Air in Small Businesses
- Reviewing the MacBook Air with M1 Chip
- MacBook Air vs Windows Ultrabooks
- Sustainable Use of MacBook Air
- Anticipating Future MacBook Air Developments